This blog post is a collection of resources to help you copy the process of bringing HTML5 games to the Google PlayStore. It is based on what I learned when creating the Snot Kid Android Game.
My article is here to help you clarify questions that might arise while you follow the Cordova documentation. I’m basically explaining the things I wished somebody had told me while I was figuring it out myself.
Introduction
My first Android game was this: Snot Kid.
What You Need to Install
To be able to turn your HTML5 game into an Android game, you have to install a bunch of things:
After installing these two things, you can create Cordova apps but you cannot create Android apps! For this you need to install more things:
- Java Development Kit
- Gradle
- Android Studio which includes the Android SDK
Cordova Documentation
There are two pages in the Cordova documentation that lead you through the whole process of installing all the software and creating your Android app:
Having gone through the whole process myself, I can ensure you that if you follow the documentation step-by-step as described it will work.
However, there are some confusing sections where you might be unsure about what exactly they want you to do. The rest of this article is targeted at exactly these sections.
However, if you still have open questions about the process feel free to leave a comment below.
NPM & Cordova CLI
CLI stands for Command-Line Interface. After installing Cordova, you will have access to Cordova specific commands in your CLI.
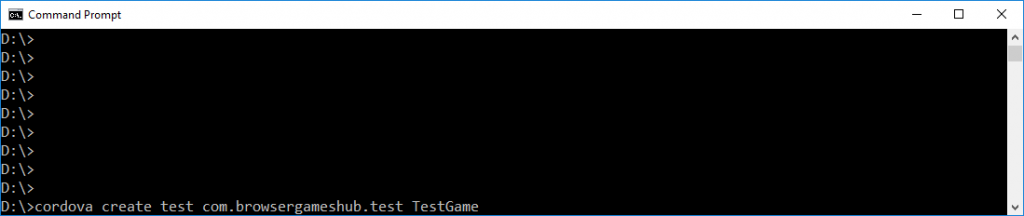
On Windows machines, your CLI is called Command Prompt. Once Cordova is installed, you can just type “cordova” followed by Cordova commands to execute them. For example:
By the way, that’s how you installed Cordova using Node’s NPM. NPM is also a CLI from which you can execute npm-Commands, such as npm install -g cordova.
If you are not used to working with this console, don’t worry. All you need to know is that if the Cordova documentation asks you to execute any of these in-line commands using cordova, npm, or any other, then you have to do so in the Command Prompt.
Just type the command and press ENTER on your keyboard to execute it.
Navigating Directories
On a second note about the CLI and Command Prompt application: It is important you execute the commands in the correct directory!
Directory means a folder on your computer. So when you create your Cordova app you first need to navigate to the folder in which you want to have your app folder created!
Use the cd command to change directories:
cd FolderName
cd PathName\FolderName
If you have to change to a directory on a different drive on your computer, simply type the drive-name to move there, for example:
C:
D:
That’s why in the Cordova documentation it tells you to execute cd hello after you’ve executed the cordova create ... command. It created a new folder for your new app and now you need to move into the app folder to continue work!
As overly simplified as this might sound to some of you, the cd command is like double-clicking a folder with your mouse.
Cordova Is NOT Android
Probably the most confusing part about the whole process is how the Cordova documentation sends you to a completely different page in the middle of their tutorial. It makes sense in hindsight but if you are new to this, you might think you are in the wrong place now and missed a step somewhere.
Before you reach “Build the App” there are the links leading you to Gradle, Android Studio and Android SDK installation.
The installation itself is very straight forward and you just need to follow the documentation step-by-step. The confusing part, especially if you are new to this, is setting the environment variables for Java!
If you install everything as described in the documentation, these will be environment variables you have to set. Make sure you adjust the user name to your computer’s!
ANDROID_HOME
C:\Users\USERNAME\AppData\Local\Android\Sdk

JAVA_HOME
C:\Program Files\Java\jdk1.8.0_181

Path
C:\Program Files\Gradle\gradle-4.9\bin
%JAVA_HOME%\bin
C:\Users\USERNAME\AppData\Local\Android\Sdk\tools
C:\Users\USERNAME\AppData\Local\Android\Sdk\tools\bin
C:\Users\USERNAME\AppData\Local\Android\Sdk\platform-tools
%ANDROID_HOME%\tools
%ANDROID_HOME%\platform-tools
%ANDROID_HOME%
If you have installed everything listed above, following the two documentation pages step-by-step, and then set all the environment variables as I listed above, you should now be done with the whole installation.
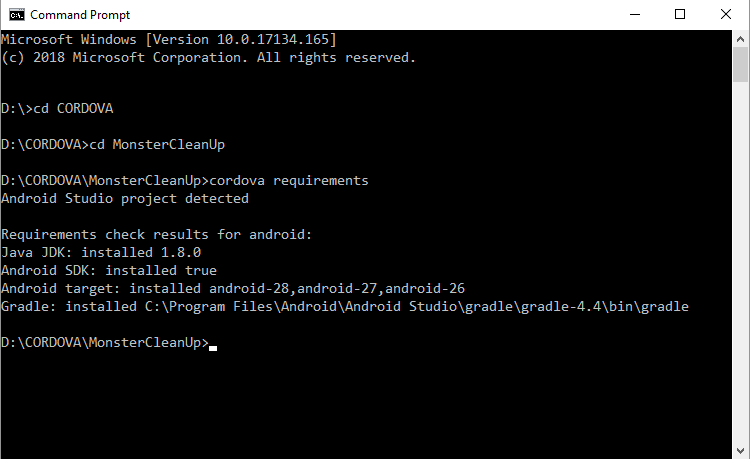
Before you start working with it, run this command to check everything is installed properly:
cordova requirements
Android SDK Installations
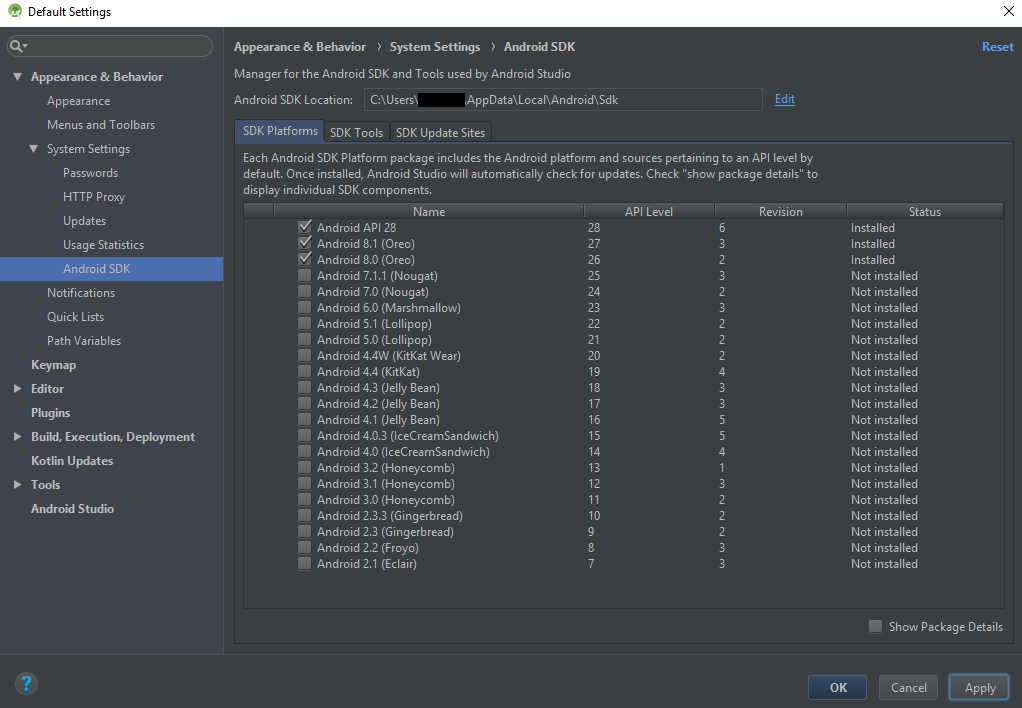
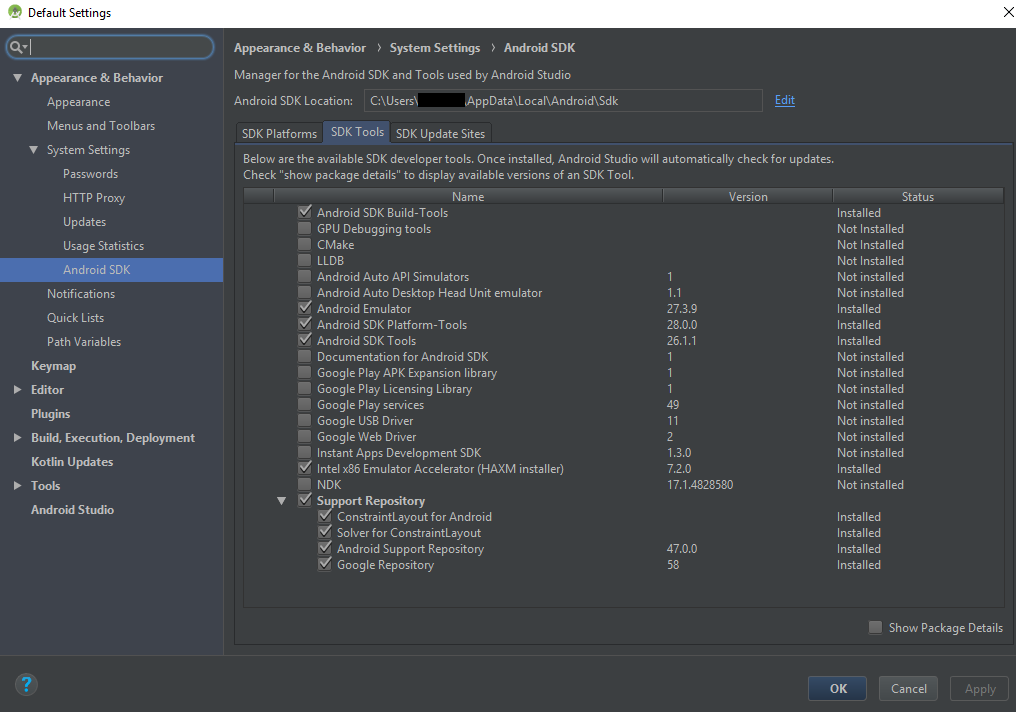
As described in the documentation here, you should now start Android Studio and add all required SDK packages.
Because writing it out makes it sound more confusing than it actually is, here are two screenshots of what it looks like when you’ve added all the packages (all the ticked boxes):
Cordova Wrapper For Your HTML5 Game
At this point, launching your game as an Android app is not far away anymore! All you need to do is add the Cordova dependency and add your game code to the deviceready event.
Note: All your game code, including the html and css files, have to go into the www folder in your Cordova project folder.
Here is what you need to add to your index.html file:
<script type="text/javascript" src="cordova.js"></script>
Note: The cordova.js file does not need to exist in your www folder! This file is created by Cordova at runtime.
And here is how you listen to the deviceready event to finally launch your HTML5 game as an Android app using Cordova:
var cordova_app = {
    // Application Constructor
    initialize: function() {
        document.addEventListener('deviceready', this.onDeviceReady.bind(this), false);
    },

    // deviceready Event Handler
    //
    // Bind any cordova events here. Common events are:
    // 'pause', 'resume', etc.
    onDeviceReady: function() {
        this.receivedEvent('deviceready');
    },

    // Update DOM on a Received Event
    receivedEvent: function(id)
    {
	console.log('Received Event: ' + id);

	// Launch my HTML5 Game (mine was created with Phaser 3)
	// This could be any JS code that you usually run for your HTML5 Game
	var app = new App();
	app.start();
    }
};
Note: I highly suggest you first look at the index.html and index.js files from the Cordova skeleton app. These files are automatically created when you create a new Cordova project folder.
With my example code above it should be quite easy for you to figure out which parts you can keep and which ones you need to replace for your own game. If you still have questions, feel free to leave a comment below!
Now onto testing your newly created Android app!
Don’t Build The App To Test It
You actually don’t need to build the app just to test it. I would wait building it until you have a version that you want to publish somewhere.
Testing The App With The Emulator
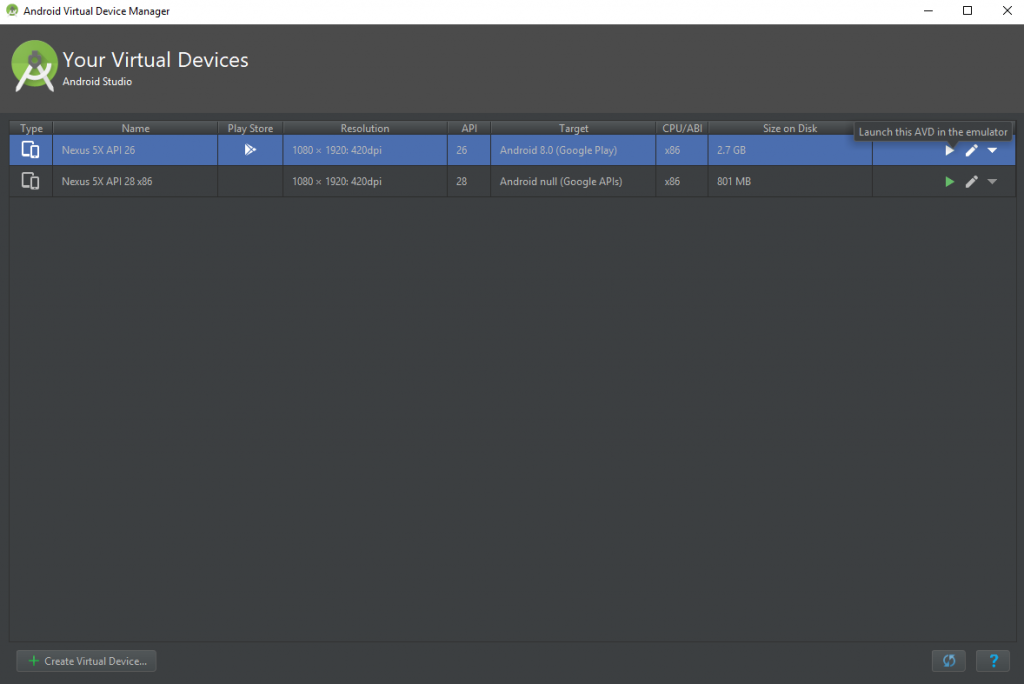
Step 1: Launch the emulator from Android Studio. Make sure your emulator runs on the API version 26 (at this point of writing). If not, you can easily create a new emulator where you set the version to 26. Click the “play” symbol to launch the emulator. See screenshot below:
Step 2: Using your console (MacOS) or command prompt application (Windows), navigate to your Cordova project folder. Launch the app in your emulator with the folllowing CLI command:
cordova run android
Step 3: Wait for the emulator to run your app! You should not be doing anything here until it automatically starts. Check the command prompt for any Error messages if it didn’t work.
Testing The App With Your Android Device (Phone / Tablet)
Step 1: Connect your android device (phone / tablet) with your computer via USB.
Step 2: Using your console (MacOS) or command prompt application (Windows), navigate to your Cordova project folder. Launch the app on your phone / tablet with the folllowing CLI command:
cordova run android
Step 3: Wait for the app to launch on your device! You should not be doing anything here until it automatically starts. Check the command prompt for any Error messages if it didn’t work.
Debugging Your Cordova App on Android
To be able to debug your app while it is running in your emulator or on your actual device, you need to do two things:
- Enable USB Debugging
- Check the JavaScript console
See this post here how to enable USB Debugging. It is the same procedure in your emulator and real device. Most likely your emulator already has it enabled, though.
Once it is enabled, you have to use the Google Chrome browser and go to the following URL:
chrome://inspect/#devices
There you will see your device (or emulator) listed. Once the app launches, a “inspect” link will appear under your device name. Click it to start the JavaScript console which you can use to debug your game.
Creating Your Android App
Please remember that throughout this guide, I’m assuming you have followed the Cordova documentation here. My article is here to help you clarify questions that might arise while you follow their documentation. I’m basically explaining the things I wished somebody had told me while I was figuring it out myself.
Anyways, creating your Android app now is as simple as executing the following command in your console / command prompt. Remember to execute it from your Cordova project’s directory!
cordova build android
the command created an .apk file in the platforms\android\app\build\outputs\apk\release folder of your Cordova project.
Basically, you could transfer this .apk file onto any Android device and use it to install your app! However, this .apk file is unsigned and users have to allow unknown sources to install it. Moreover, the Google PlayStore will not accept unsigned apps.
Creating An Android App For The Google PlayStore
Creating the signed Android app was actually the easiest part once I found this perfect guide here!
This guide is very clear and doesn’t leave nothing out. So I am not going to repeat it because if I would tell you my steps, I would just copy that article as I am doing it exactly the same way step by step.
So here it is: Create & Sign Your Android App With Cordova
Just one word about the Zipalign program for all Windows users: You will have to run the Zipalign program with the directory path!
By default, it is installed in this directory:
C:\Users\[USERNAME]\AppData\Local\Android\Sdk\build-tools\[VERSION]\
Make sure to replace [USERNAME] and [VERSION] with what applies to your computer.
To make it absolutely clear, this is how you would rename your signed .apk file with Zipalign:
C:\Users\[USERNAME]\AppData\Local\Android\Sdk\build-tools\[VERSION]\zipalign -v 4 app-release-unsigned.apk app-release.apk
The file created from this is “app-release.apk” and this is the file you can upload to the Google PlayStore!
The Ultimate Phaser 3 Guide
Everything you need to make real, polished, professional Phaser 3 games, you find it in this guide here: HTML5 Game Development Mini-Degree
I highly suggest you check it out!


Hello, nice tutorial! I’ve generated an apk but I am having some troubles making it fit well on my device. I’ve used the same ratio as you in your other tutorial (576×960)… and made some tests with css but with no sucess… any tip?
I’ve made some games for hobby some time ago and your website motivated me to come back, thanks!
Hey rhennig, thank you so much for reading and commenting! I’m glad it’s a motivation for you 🙂 Below you find the code that I use to automatically re-size my game for any screen size and device. CSS code for the HTML div. And the JS code to re-size the canvas on the resize event. I hope it helps! (I had to remove some opening tags to make the code visible in the comment, don’t forget to check the code first before copy-pasting!)
body {
margin : 0;
overflow : hidden;
background-color : black;
}
canvas {
height : 100%;
}
#phaser-app {
margin : 0 auto;
}
div id=”phaser-app”>/div>
window.onload function()
‘use strict’;
// Resizing game canvas
function resizeApp()
{
var div = document.getElementById(‘phaser-app’);
div.style.width = window.innerHeight * 0.6;
div.style.height = window.innerHeight;
}
window.addEventListener(‘resize’, function(e)
{
resizeApp();
});
resizeApp();